As safety concerns continue to rise in Nigeria, homeowners and businesses are turning to integrated smart security systems for round-the-clock protection. But for many, the idea of planning and installing such systems can feel overwhelming.
The good news? With the right approach, you can build a reliable, connected, and easy-to-manage solution.
Here’s a step-by-step guide to help you get started.
Step 1: Assess Your Security Needs
Before buying any device, identify the specific risks you want to address.
Is your goal to prevent burglary, monitor staff, or control visitor access?
Do you need indoor, outdoor, or perimeter coverage?
What areas are most vulnerable — gates, entrances, storage rooms, or offices?
A clear needs assessment prevents overspending and ensures the system fits your lifestyle or business operations.
Step 2: Set a Realistic Budget
Smart security is an investment, but it doesn’t have to break the bank. Decide how much you’re willing to spend upfront and plan for gradual upgrades.
For example, start with CCTV and motion sensors, then add access control and smart alarms later.
Step 3: Choose the Right Devices
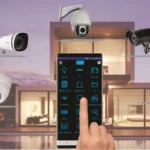
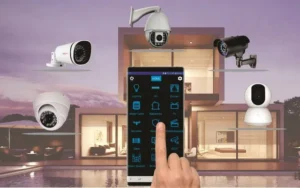
An integrated system works best when devices complement each other. Key components include:
CCTV Cameras for real-time monitoring.
Motion Sensors for instant alerts.
Smart Door Locks & Access Control for secure entry.
Alarms & Sirens to deter intruders.
Smart Lighting for visibility and deterrence.
Smoke & Gas Detectors for safety beyond intrusions.
Step 4: Ensure Compatibility
Not all devices “speak the same language.” To avoid issues, select products designed for integration or purchase from providers that offer bundled solutions. Compatibility ensures smooth communication between cameras, sensors, and alarms.
Step 5: Plan for Connectivity and Power
Smart systems rely on internet and electricity. In Nigeria, where outages are common, integration with backup power (inverters, UPS, or solar bundles) is essential. Ensure your Wi-Fi and power infrastructure can support the devices you’re installing.
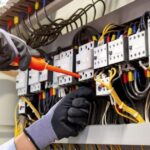
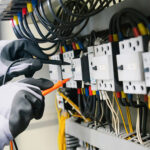
Step 6: Professional Installation and Setup
While DIY is possible for some devices, professional installation ensures correct wiring, placement, and system integration. A trained installer can also configure the mobile app or control hub so you can easily monitor everything from one dashboard.
Step 7: Test and Train
Once installed, test all devices thoroughly. Trigger motion sensors, check camera feeds, and verify alarms. Train family members or staff on how to use the system effectively, including responding to alerts.
Step 8: Maintain and Update
Like any technology, smart systems need regular maintenance. Update device software, clean camera lenses, and replace worn-out parts. Routine checks guarantee long-term reliabilit